What I’ve accomplished on my 2013 list … (since Feb.)
OK, well haven’t I been a slacker. I haven’t done an update on the list since. … well, the only post I did was what I did in January. So let’s get to updating the list from everything since January. Some have been going great, others, well, there’s always next year, right?
If you missed it, here is the original list.
Update from February to July of …

NUMBERS COMPLETED
10. Visit my friends who moved away.
• Went to Augusta (in January)
• Went to Baton Rouge (in February… Mardi Gras!)

11. Take a trip with the girls.
Can you say Cancun?
25. Go swimming.
Two birds with one Cancun stone.
27. Visit Minnesota.
Completed last week!
32. Sell old couches.
Done!
38. Try Buffy the Vampire Slayer.
Oh, I tried it. I don’t know if I just missed the window on when I would like it or something. I didn’t even finish the first episode.
40. Get a passport.
Got this done in February right before the Mexico trip.
41. Wash my car.
By hand … BOOM!

43. Go to Mardi Gras in New Orleans.
SO MANY BEADS!
NUMBERS I HAVE FAILED
13. Blog at least once a month. (um, yeah, sorry about that)
NUMBERS IN THE WORKS
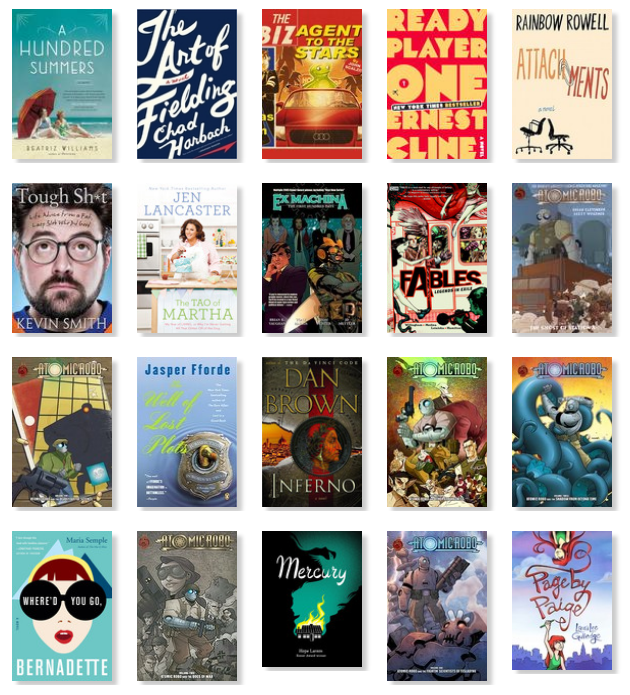
4. Read 50 books.
At this point in time, I stand at 44 books, so I think this one will happen. The last time I was this close to my book goal though, I moved it up 10 books, and then didn’t make it. So this year, I’m just going to relish the extra ones and not try to over extend myself.
I was going to type them all out, and then decided, wouldn’t you rather see the covers (from latest to earliest)? Yes, yes?


9. Play through our board game collection. Every game at least once.
We’ve been kind of slacking on this one. We did pretty well in the spring, but the summer is a different story. Plus, I bought a couple more games (I have a disease) …
26. Go Frisbee golfing at least once a month.
This one is still going strong.
35. Go fishing at least four times.
I’ve only been twice so far. Once in Minnesota and once in Alabama.
44. (The Secret One) which is actually “Get good grades.”
So far so good on this one. All A’s so far.
And there you have it. A super-belated post about the list. And what did I learn today? That I still have a lot to do …
Making a wine-cork trivet

I’ve always noticed trivet kits on Amazon and thought, “How adorable!” But the prices are a little scary, especially when you really only get a wooden box. So when I saw that there was a sale on one, I jumped on it.

Using a kit is cheating, but I’m OK with that. The one I used it pictured above. Yes, if I was more adventurous, I would be all over that, but I don’t even have a saw to cut wood. So, there you go.
First step: If you are thinking about making a trivet, collect wine corks. If you have WAY MORE than you think you need, keep going. You’ll probably need more than that. Thankfully, my friends and I were at a restaurant that sells a lot of wine and my friend Maya asked them if we could have some of the corks. They totally came through and gave me an entire take-out box full. If it weren’t for them, I would probably still be trying to collect enough.

Second step: PLAN. Plan, plan, and then plan some more. Lay everything out and figure out what you are going to do. I could not get the design that was featured on the box to work for me at all, so just keep trying until you find something you like.

Third step: Cut the corks, as needed, to fill gaps. You’ll need ends, and slices of some for the vertical corks (if you decide to do a design similar to mine). This step was messier than expected.

Fourth step: Pull the corks back out from the frame. Start gluing it row by row. Some people use Elmer’s glue, and a little packet was included (a WAY TOO small packet), but I thought it would be too messy and you’d have to wait until it dried. I’m not very patient, so I used super glue. It worked great. And after a couple months, it’s still holding strong.
Fifth step: Let it set, and you are done! Go cook something hot and try it out!
How to make adorable hanging kitchen towels

These are two finished towels from my first batch.
This has been a post long time in the making. 2 years ago, I came upon this post on Pinterest. (Here is the pdf of the directions and pattern.) I thought, “Oh, what a great idea.” And so I proceeded to make them for Christmas presents in 2011. And everyone rejoiced. My mom, proceeded to tell me that she needed more of them AND wouldn’t it be a great idea to do some for the different holidays? Well, yes, yes it would. But, I had just got done thinking to myself that I wasn’t going to make anymore of them (I think I just dreamed a little too big in my first batch). But, you know, she is my mother. So, for Christmas 2012, I decided that I was going to make another batch of them. This time I scaled back on how many people received them, BUT each person that did get them got a big selection of holiday ones, so I think it basically ended up being the same.

Here is my second batch towels.
Things I learned while making the towels:
• Go big on the buttons. I ended up picking out specialty buttons for the second batch and they basically ended up stealing the show. Splurge a little on the buttons and you won’t regret it.
• Same thing goes for towels.
• If you use interfacing, thicker the better. I didn’t use the flannel as the pattern suggested, I actually used interfacing (mostly because I already had some that I could use). In my first batch, I just use the normal kind that I had. After a couple washings, it starts to look kind of saggy. So, as my grandma suggested, on the second batch, I used a thick interfacing. It worked SO MUCH BETTER. Listen to your grandma.
• Don’t skip the ironing. I hate ironing. I actually only have an iron in the house for crafts, and I still don’t want to use it. With this craft though, don’t skip it. It makes your life 100 percent easier.
• Assembly line. I found the easiest way was to do each step for all the towels at once. Already have the iron out? Go ahead and iron on all the interfacing. Have out your button foot? Go ahead and make all the button holes.
And now, let’s get to actually making the towels … (note: all of these steps are from the first batch)


1. After you have gathered all of the fabric, thread, towels, etc. Wash everything.
2. Cut out the pattern pieces and put them to together (tape, glue, etc.)

3. Cut out the fabric. You will need two matching pieces per towel.

4. If using interfacing, go ahead and iron it on. Be sure to get into the top, pointed area. If using flannel, go ahead and cut out that as well.

4. Pin the pieces together with one side of fabric (right-side up) and the other fabric (right-side down).

5. Stitch around starting at the bottom (on either side), all the way up and back down to the other side. Leave the bottom open.

6. Turn it right-side out and then iron.

7. Sew up the sides again. So you have something else that looks like above.

8. Cut towel in half. (You only need a half for each one.) Then gather the raw edge of the dishtowel up so that it will fit in your opening nicely. Do this step by using needle and thread to gather.

9. Turn in a hem on the bottom. Insert the top of the towel (raw, gathered edge) into the open side of the handle — make sure it’s at least an inch. And then pin in place.

10. Sew at least two rows of stitches to hold in place.

11. Grab your button. Use it to mark on the handle that folds down where you would like your buttonhole to be. (I just placed the button down and marked a little above and a little below the actual button.) Here you can use your buttonhole foot or whatever fancy things you do to make holes. My machine decided to break and not to the button function anymore (about half way through the first batch). It would only go up one side but not the other (quite the pain)!

12. Fold down the top part of the handle and figure out where you would like the button to be. Mark it on the wide base. Sew on button.

13. And you are done!
Here are some highlights of the towels that I made:


Some nightstand window shopping
I am in the market for some new nightstands for our master bedroom. Right now, we are using my husband’s previous end tables for nightstands. Mine is OK, but his is smaller and he knocks stuff off stuff falls off all the time. It’s so bad it’s a running joke at this point. So I might not always be actively looking, but it’s in the back of my mind.
One thing I can’t wrap my head around, when dealing with nightstands, is how expensive they are. You want $300 for that, really?? I could get a whole dresser for that. It’s just like when the shorter bookcase is like $5 cheaper than the bigger one. It pains my soul. And the company knows it has you between a rock and a hard place because when you need a certain size, bigger isn’t always better.
So I was at Hobby Lobby picking up supplies for another crafty project I’m working and I noticed when I was on my way to the checkout (I could wander around in there for hours looking at everything) a table that might work for a nightstand. So here are some of Hobby Lobby’s offerings that caught my eye. Ultimately, some of them turned out to be wrong after I looked more closely, some were vetoed by the husband and, in the case of one of them, deemed to be better fit for a kids’ room. So, without further ado, some nightstand window shopping …

Super cute. There is actually an American flag painted on the top of this one. FAIL.

Husband said, “No.” So, that’s that.

This was actually one of my favorites. Then I realized that it would look super cute in a kids room … yep. Not really what we are going for.

This was the husband’s favorite at first. I really liked it but the issue I had was I’m going to lose everything in all those little drawers. Plus, they were a little hard to pull out.

The colors of this one were MUCH better in person. While cute, didn’t really make me want to pull out my wallet.
And …. right now the leader of the pack…

This is the winner right now. The industrial look meets the wood look. I’m going back to measure this one.
I would like to get some nightstands that will go with a wood headboard. (I LOVE the reclaimed wood ones floating around everywhere.) So, even though I don’t have one now, (Master bed frame is actually black metal) I want something that will work with both.
I am going to go back and take a measuring tape with me. I’ll keep you posted if any big purchases are made!
What I accomplished in January
A January update to the …
4. Read 50 books.
In January:
- “Reached (Matched #3)” by Ally Condie
- “The Sword-Edged Blond (Eddie LaCrosse #1) by Alex Bledsoe
- “Where Things Come Back” by John Corey Whaley
- “Anna and the French” by Stephanie Perkins
9. Play through our board game collection. Every game at least once. (At this writing, collection totals 285 (without expansions).)
Played in January:
• The Village
• Carcassonne the City
• Magic: The Gathering
10. Visit my friends who moved away.
• Went to Augusta
13. Blog at least once a month.
• Kind of meta, but blogged the list itself on Jan. 25.
26. Go Frisbee golfing at least once a month.
- Went on Jan. 27
33. Get drunk.
• Apparently I wanted to get this one out of the way or something. I finished this one on Jan. 5. Of note: I had the worst hangover of my entire life on Jan. 6. I still haven’t been able to touch any wine.
I hope to get another post up before the end of the month, so check back next week!
My super ambitious (well, not that ambitious) list for 2013
Hello, all! I’ve missed you guys! When WordPress sent out their year-in-review email about this blog, it was a rude awakening. I know I don’t post that often, but it had the audacity to tell me that I only posted 3 times in 2012. How pathetic! This year, I am vowing to do better. So far I’m not off to a good start since my first post is going up on Jan. 25, but we all have to start somewhere, right? So, here I go…
Another blog I read, Pinstrosity, mentioned earlier this month about hating New Year resolutions (which I tend to agree with). Instead, she made a list of 101 things she wanted to do/accomplish in the new year. The list had to be specific, no “lose weight” or “be nicer,” it had to be measurable things. I know you can tell where I am going with this so I’ll just get to it …
50 (I’m not ambitious enough for 101) things I want to accomplish in 2013
(This list is in no particular order)
1. Take my husband to the High museum.
2. Have another game auction/sell unwanted games/cull collection.
3. See an opera.
4. Read 50 books (This is pretty standard. I’ve read a little over 50 the past couple years … ever since Project 15K.)
5. Go camping at least five times.
6. Get a massage.
7. Finish the Georgia State Park Geo-Challenge PassPort.
8. Finish portal cross stitch.
9. Play through our board game collection. Every game at least once.
10. Visit my friend who moved away.
11. Take a trip with the girls.
12. Watch all the movies and TV we own but have never seen.
13. Blog at least once a month.
14. Make a skirt.
15. Finish Spin’s secret present.
16. Put up a bathroom shelf that I haven’t finished because I don’t want to measure.
17. Take down ugly bathroom wallpaper.
18. Get chimney cleaned.
19. Get windows replaced, at least get quote to have them done.
20. Plant something or build a planter around the mailbox.
21. Get new fake flowers for outside hanging planters.
22. Get bench or rocking chairs for front porch.
23. Paint and finish frame for new prints.
24. Match all socks and toss ones without pairs.
25. Go swimming.
26. Go Frisbee golfing at least once a month.
27. Visit Minnesota.
28. Paint something.
29. Finish drawing for a friend.
30. Get a tattoo.
31. Clean garage.
32. Sell old couches.
33. Get drunk.
34. Try to keep bathroom clean.
35. Go fishing at least four times.
36. Write a short story.
37. Read three books that my husband wants me to read.
38. Try Buffy the Vampire Slayer.
39. Visit an East Coast beach not in Florida or Georgia.
40. Get a passport.
41. Wash my car.
42. Try to get the ivy in the backyard under control.
43. Go to Mardi Gras in New Orleans.
44. (Secret)
45. Make two new friends.
46. Reseal back deck.
47. Put on all stickers for car that I’ve amassed.
48. Go to the theater with the recliner chairs.
49. Add all movie tickets to ongoing poster.
50. Put/move all event tickets to new ticket book.
Taking art into my own hands
About a year ago, I redid my guest bathroom. I found the cutest shower curtain at Target with trees and woodland creatures. Adorable! It’s done in super cute ’60s colors.

So I paint the bathroom a dark yellow and buy a new rug, etc. I’m really excited for the change. (The last stuff in the bathroom had traveled with me from my parent’s house and I had been using it since middle school. It was in a stars-sun-moon theme.) Then I run into a snag. I can’t find any art to go with it. Any woodland creatures I find come in super bright pastels or dark den colors. By the way, do you know how hard it is to find nice looking squirrel art? No? Well, take my word for it.
Finally after about 6 months, I found these two owl pieces at Target. (They are about 8×8 squares.)

Perfect … for one wall. BUT, even with those, I still had a major gap above the toilet. Previously, a nice big wire stars and moon had hung there. So every time I went in there it was a huge void of nothingness. Plus, you can see it when you walk up the stairs. Plus, it helps draw attention away from Mr. Toilet. Triple whammy.
I was at Pier One (which I didn’t realize still existed nor was I really interested in it as a teenager) and saw some very cool owl art that I just had to have. From memory, I thought most of the colors were right …

Look at how majestic and adorable he is! The flowers are a prefect color, but you may have noticed the completely red background Mr. Owl is chilling on. Yeah, there is absolutely no red any way in that room. Not that I need everything to be matchy matchy, but it was kind of clashing with everything else. I thought it would be OK. I even left him in there for about 4 months now to see if it would grow on me. The answer? No, no it did not. I have been looking and still haven’t found anything. I did find someone on Etsy that had made art that goes with the exact curtain, but it was more for kids and they wanted way too much money for some easy Photoshoping.
On Sunday, I was cleaning out the guest room closet (which is my craft closet) and I found some blank canvas. So I decided enough was enough! I had previously made art to match our downstairs bathroom, so why not this one, too?
So I grabbed a pencil and sketched out my idea. And hung it up to make sure I liked it.

Satisfied, I went on to painting. Had a hard time deciding what the background color should be. It just looks white in the photos, but there’s a lot more texture to it. I started out with more of a dark tan, but hated it. So while white isn’t too exciting, I think it works. And mixing some of the colors was a bitch. I realized just how long I haven’t painted — some of my tubes were completely dried out. See what my end palette looked like below. (Don’t worry. It was not clean to start with. It actually hangs on my wall when not in use.) (And, yes, that photo was taken in the bathroom. I might have painted in there because I didn’t want to take the shower curtain off and on. Call me lazy, I saved two steps!)

And, drum roll, please ….. The end product!

I haven’t sealed it yet, so I still need to do that, but here is what it looks like up.

And so that’s it. Lesson learned: Can’t find the art you want? Make it yourself.
Dear Avenue, You Were Dead To Me
UPDATE: Corporate Avenue contacted me about my issue. I was put in touch with a general manager who straightened everything out. She said she would talk to the store manager and that when I went back there would be no problem. I went to the same store to exchange the shoes, even though I was worried about a repeat experience. The sign saying that they didn’t except returns was nowhere to be found. The store manager was super nice and didn’t give me any grief. It seems getting in trouble with upper manager can make people do a 180. I’d like to thank The Avenue for getting everything sorted out for me! Below is the original post.

Avenue, you are dead to me.
I used to like the Avenue, I really did.
Every so often, you could find really cute things there. I personally loved their bras and, recently, their shoes. (Especially because they go up to my size 12 boats.)
BUT, I had a horrible experience with them today. Recently, I purchased a pair of shoes online. The shoes were surprisingly too big. So instead of paying to send them back in, I decided to exchange them at a store.
Call the store to make sure they have the exact ones that I need but in a size smaller. They do. Score!
Drive to the store. Try them on. Decide that, yes, a smaller size would fit much better.
The cashier was very nice, but had to call over a manager to do the exchange. Manager wasn’t very nice to begin with, so maybe I should have been tipped off. While she was working on the exchange, I noticed this sign and promptly snuck this photo:

Thankfully, I wasn’t returning the shoes. I wouldn’t have even purchased from their online store if I couldn’t do in-store exchanges. Paying to ship it back-in-forth just isn’t my deal. So, unless you offer free return shipping, I won’t be ordering from you.
She was in the middle of the exchange when she finally looked at my receipt.
Manager: “These were free.”
Me: “Yeah, I used a coupon.”
Manager: “Well, I can’t exchange them.”
Me: “What do you mean? Why?”
Manager: “You didn’t pay anything for them. You are taking a product out of my store that you didn’t pay for.”
Me: “So you aren’t letting me exchange them?”
Manager: “No.”
At this point, I grab the shoes and leave. As I write this, I wish I would have stayed and put up a fuss. I was just so angry, I had to get out of there.
I am trying to exchange the exact same shoes (minus the size). Everything was the same, down to the color. You are getting the same shoes in return. How am I taking your product? You will have the same product! I am not stealing any money from your store.
I get to my car and decide to call the customer service number.
Once I finally get someone, I explain my deal, and then this happens:
CS: Why wouldn’t they let you exchange?
Me: Because they said I got it for free when I just used a coupon.
CS: Well, they should let you.
Me: Yeah, but they are refusing to.
CS: Well, you can send them in and exchange them.
Me: But then I have to pay. Why should I have to pay for shipping when I am at the store right now? I should be able to just exchange them.
CS: Well, we aren’t affiliated with the stores. You would have to talk to the manager. This is just the costumer service for online Avenue.
Me: She is the one that refused the exchange.
CS: Well, there’s nothing we can do.
Me: Is there someone else I can speak to that could help me? Do you have a number for corporate?
CS: No. You would have to talk to the manager.
Me: So I can’t exchange my shoes unless I pay to ship them back.
CS: Yes … (and then I think she said something else)
Me: Thank you for nothing. (Then I hung up)
I have looked for other number, but I can’t find any.
I am so angry. On their site it says, “Your satisfaction is guaranteed.” I guess they better be taking that down.
Goodbye, Avenue, you have lost a costumer.
Making a wreath for February/Valentine’s Day

After Christmas, there is always this weird period of time between January and the beginning of spring where I don’t really have anything for my door. I do have a winter wreath that’s just greenery, but I have been looking at that since after Thanksgiving. So, I decided to make a wreath for February. Especially after I saw this one on Pinterest.

BUT, it didn’t have a how-to, so here is what I did to create a version of that wreath.

First, the supplies. You’ll need:
Wreath
Yarn
Pins (small, flat head)
Glue
Felt/Fleece

I really wanted one of those white foam wreaths, but I couldn’t find one. Plus, the wreath that I got was only $5.

To start, make a knot at the end of the yarn. Then, put a pin through the knot so that it stays in place.

Push the pin into the back and start to wind the yarn around the wreath.

It will be slow going, so don’t get discouraged!

Then just wind and wind and wind. I cut the yarn into manageable pieces and pinned them on. The smaller pieces allow you to get a nice, tight wrap.

I would just use the next piece to go over the pin so you can’t even see them when you look at it.

Wrapping is complete!

And then pick out the colors for your hearts. I picked pink and red since those were the colors I thought were in the Pinterest one, but I also bought white since I thought I might want three colors. I purchased red and pink felt, but I bought white fleece because it wasn’t as see-through as the white felt.

Then, initially I got a template off the Internet to cut out my hearts.

But when I laid them out, I didn’t like them.

So I tossed the template and just free-handed it. I also decided to ditch the pink.

After you cut out all your hearts, arrange them as you would like on the wreath.

Take your yarn and cross it over each heart. Some will stick up, but don’t worry about it.

Once you have them all crossed, get your glue. Use toothpicks (at least that it what I used) to help get the glue down into the hearts.

And once it is dry … it’s finished!
Making a Christmas card wreath

My old card wreath sucked. I couldn’t fit but like 6 cards in it and whenever I went to add a card, half of them would fall out. So this year, I decided to fight back and make my own card wreath (as seen above). (Since I couldn’t find any in the store, much less one that I really liked.) Here is how I made it …

The supplies
My supplies:
Clothespines (I ended up using about 30 of them)
Paint (it doesn’t really matter what colors you pick)
Wooden balls with predrilled holes (I ended up using 14 of each color.)
Wire hoop (I had issues with this, but more on that later.)

The paint
I went with Americana’s Plantation Pine (dark green), Hauser Medium Green and Deep Burgundy.

Testing colors
I did test other colors, but decided to go more wintergreen than bright greens.

Getting ready for paint
I took apart the clothespins to get ready for painting. If you paint them when they are together, you miss a big chunk where the wire is and it’s easier to paint them shut.

Paint!
I used a disposable bowl for faster cleanup.

One side painted
Paint one side at a time allowing it to dry, otherwise it will stick to the newspaper (if you are using newspaper to protect your table). Some of them needed two coats (especially the dark green), some of them will only need a touch-up.

Letting them dry
You will notice the ones that have bits of paper stuck to them … hint: I tried to paint both sides at once. You can just paint over them and it’s not even noticeable. Score! Plus, if you really mess one up, just point that side to the back.

Pile of dry clothespins
After letting them all dry. It’s now time to put them back together again. This is NOT fun. I did not document this step with photos. I don’t think the camera would have captured all the cursing going on anyway.

Painting the beads
After painting the pins, or as you let them dry, it’s time to paint the beads. After trying to just paint them, I realized that there was no good way to set them down on the paper without them sticking. Lightblub! If you have any footed glassware get them out, turn two over and get your floral wire (or any wire really).

Put the wire around the base
Attach it to one end, thread the beads onto the wire, then connect it to the other side.

Painted beads
Viola! Instant bead painting station.

Ready to be put on the wire!
So after you get all the springs back on and the beads are dry, it’s time to put them on the hoop.

Gold hoop that didn't work
It took me like three stores to find this metal hoop. Good news: I finally found it, yeah! Bad news: The hoop was too thick to fit through the clothespins. Be careful when picking out hoops for this reason. So it was back to the drawing board …

Second wire hoop
So I took this wire wreath holder (which fit through the clothespins and was the only other metal hoop I could find) and used a pair of wire cutters to get one hoop off. Good thing about doing it this way was that I would get at least two hoops easily (four if I really wanted to work for it) from one.

First try at a pattern
Now comes the time to put it all together. This is the first pattern that I tried. I realized, however, that I didn’t like the light green bead up against the light pin, so I went back and repainted half the light green beads to be dark green. Basically the moral of this tale is to plan your pattern beforehand.

Attaching the ends
So after you get the pattern that you want on and fill the hoop (remember to leave room for the bow), it is time to attach the ends together. Originally, I had grand ideas of using metal glue to put them together. By the time I got to this step though I really didn’t want to wait for anything else to dry. Enter the duct tape. That’s right, I used duct tape. What are you going to do about it?

The tape
I just wound it around a couple of times (after moving it at least twice to get the shape that I wanted). It worked awesomely. Before you make things final, hang it on the wall a couple of times to make sure that it is going to fall how you would like it. Too tight and it won’t touch the wall at all. Too loose and it starts looking like an oval.

Bow-making time
Time to get out the ribbon. Remember to get wired ribbon because it’s easier to work with and will keep it’s shape. I am awful at making bows so I won’t go step-by-step. I’m sure you have a better way to make them than I do. If you are bow-making challenged, you can always just buy one.

Attaching the bow
After the bow is completed, just wind the wire from the bow around the duct tape. Duct tape actually turned out to be a good idea because it kept the bow in place. Ha! There’s a method to my madness.

Completed!
Then flip it over, find a good place for it on your wall and display the glory that is your new Christmas card wreath!

